Showing posts with label paint. Show all posts

Monday, June 17, 2013

Before & Afters: Garage Sale Finds

A few weeks ago our little town hosted its annual city-wide garage sale. It goes over like gangbusters. I kid you not. Even through rain, the die-hard treasure hunters will keep going in their cars.

For me and my cheapness thrifty-ness, it's better than a trip to Goodwill, and that's saying a lot!

What have I found at garage sales in the past? Well, let's have a look-see, shall we?

This pretty clock with its pretty gold and burgundy colors:


How about a little ORB spray paint? That took all of 20 minutes to makeover!


This mail organizer costed 50 cents. That's a steal!


A little white spray paint and chalkboard paint certainly gave it an updated look.


And of course the famous cheese domes and candlesticks.


From ugly to pretty with some more ORB!


Have you been to any garage sales this summer? What have you found?

Monday, March 4, 2013

There's No Place (To Paint) Like Home

A week away from home has (hopefully) made my family appreciate their mommy-chauffeur, a house that smells of crock-potted meals and soap in the shower. (Seriously, how can you shower without soap, kids?)


(A few little stops for treats to bring home: locally made chocolates, sushi for me and a sampling of craft beers for Husband.)

As the 80's Michael Jackson and Journey serenade me in the background, it seems I have returned to domesticity, beginning with paint.

Husband and I have finally started painting our entryway. As opposed to the latte-colored paint chip I was "instagramming" (trust me, this will become a word in the dictionary, just like "googling") two weeks ago, we ended up with "Tea Leaves," an earthy, sage green color, close to the green in this palette:


Our lake house is basically beige, which translates as incredibly boring and devoid of personality. So we had to fix that. (Also any paint color will hide drool marks from an English Mastiff.) Really.

Husband is a perfectionist when it comes to painting. And rightfully so, he's quite skilled with a roller. I however, am of the let's-just-get-color-on-the-wall, school of thought. At least we can agree on color. (Except for when I wanted our last kitchen "butter" yellow and the yellow chosen was so bright it looked like we were riding in a school bus every morning. Epic fail.) We now choose paint color together.

So we are painting right now while we have a little down time between swim practices and softball.

For more inspiring color palettes, check out my "True Colors" Pinterest board.


Monday, July 23, 2012

Back To School Organization


Trying to keep three kids organized can be a nightmare. I tried every possible system (including the file folder one, which looked cute, but the papers in the files were NEVER looked at! Out of sight out of mind?!)

This time, I decided to make use of the clipboards we already had (and thanks to Pinterest) ended up with a much better way to keep track of papers.


I found the perfect spot in our hallway, added these three hooks I found in the basement (free!) and went to work...


I used masking tape to cover the metal clip and heavy duty wire to hold the clip back so I could spray paint them.


Now they hang with all those important papers, notices etc. The hooks hold lunch boxes and lightweight jackets. Maybe this school year, I will be better organized!


Congratulations to Mary Beth! You've won the Shabby Apple giveaway for a $50 gift card! Check your email from Shabby Apple for details! :)

Monday, June 25, 2012

A Quick & Thrifty Mailbox Makeover

Seeing as June is already coming to an end, I've been itching to do a DIY project. The trouble is life (work, kids, moving) has somehow gotten in the way! But alas, finally, a tiny project to tide me over...


I found the cutest DIY mailbox project on Pinterest and decided that our mailbox needed a makeover.


I can't believe I waited a whole month before attacking this project!

Materials used:

  • Rustoleum's Oil Rubbed Bronze (ORB) spray paint. ($4.00)
  • Red acrylic paint (53 cents, but already had it from another project.)
  • Triple Clear Glaze spray ($3.77, I also had this on hand.)
  • Elmer's Painter (marker) in white with a medium tip. (less than $2.00)
I removed the flag, painted it with the acrylic paint (because I had it,) let it dry and then sprayed the clear glaze over it to protect it. I put masking tape over the silver fixtures, spray painted the box with ORB (which took all of 30 seconds) and let it dry.

--> This is my favorite part because it was cheap and fast! 

No, I didn't stencil, no I don't own a fancy Cricut or Silhouette machine. I have a printer, that's it.

I picked a favorite font, printed our address on paper, taped it to the mailbox and wrote over the numbers and letters with a pen (slightly etching it into the mailbox) then I traced it with the white painter. This stuff is amazing. I may never use a paint brush again!


I'd say it turned out pretty cute! This was an easy (and cheap) project, hope you're inspired! What have you done lately? Leave me a link in your comment so I can see what you're up to!

Monday, April 23, 2012

For The Love Of Turquoise!

Ever since I saw this duvet cover (from Young House Love,) I can't get it out of my head...


Unfortunately, I think West Elm no longer makes this one. :(

I've also fallen in love with turquoise, I'm finding it everywhere and not sure if Husband will agree to this color in our lake house.

Young House Love
And this kitchen, oh my...

House of Turquoise
What about this bathroom? Why is it not in my house?!?


Anyway, we'll see how it goes, maybe something small, or just one (or two) rooms...visit my Pinterest page and see what our plans are for our lake house!


Saturday, July 30, 2011

DIY: Free Wall Art


First off, let's start with my oops, for posting about that fabulous snack. I'd forgotten I'd already posted about it here. Sorry guys!

But on to more interesting stuff...thanks to Pinterest (and specifically, one of my fav blogs, called How About Orange,) I was inspired to make this little beauty. Artwork from paint chips. The best part, other than it costing zero buckaroos, was me standing among the paint swatches holding them up to different light sources for about 45 minutes. (Someone must have thought I was a designer or something!) These are Glidden paint swatches.


I used an old frame from Target that I had, the frame itself, I spray painted Heirloom White last summer, cut up my paint chips (that took a little while) and put it all together...


The colors were taken from our bedroom and I threw in the red for some pop. All I used was a pair of scissors, a pen and ruler and a glue stick! A nice little craft project with a nice price too. Free works for me every single time!

Wednesday, July 6, 2011

Paintalicious

http://thinkpinkalicious.com/

I just got done reading the book 'Pinkalicious' to my daughter. A suitable book for a little girl who loves pink. This weekend, aside from fireworks and red, white and blue cake, Husband and I began to transform our littlest's bedroom.


The walls were painted white over a previous blue color. A no-no for our girly-girl. The carpet is actually gray, even though it looks blue-ish in this photo.

I'll name this color  'Cafe Au Lait.'

I found a color I loved from another paint store, shhh...had Lowe's match it (because they'd sent me a coupon) and saved the rest in an old PB jar. (Paint tip: keep the sticker, so they can scan the bar code to get the exact match if you need more paint!)


Then busted out some handy spray paint to paint the vent cover, switch plates and outlet covers...I'm still pouting over not being able to paint the woodwork white, but I'll get over it when I get all the accessories up and with the help of a neighbor, sew her a new comforter, which in the end will cost me $3.50!

Stay tuned for more posts on her room transformation...

Join me and others, we're hookin' up with Allison:


Wednesday, May 4, 2011

Ideas For A Girly-Girl's Room

Kristin DeMarco, Gifted Notions
We're in the midst of selling and buying. A house that is.

For my many bloggy friends who have moved recently, you're well aware of the burgeoning paperwork and moments of thinking "The house isn't really ours...until the fat lady sings." And I don't mean me! (Still running that treadmill in hopes of being ready for that wedding in June!)

When I have a few minutes, I allow myself to daydream about painting our youngest daughter's bedroom (mocha walls with pink curtains and white accents) I have it all planned out in my head and have been inspired by the design blogs and the pretty combination of pink and brown.

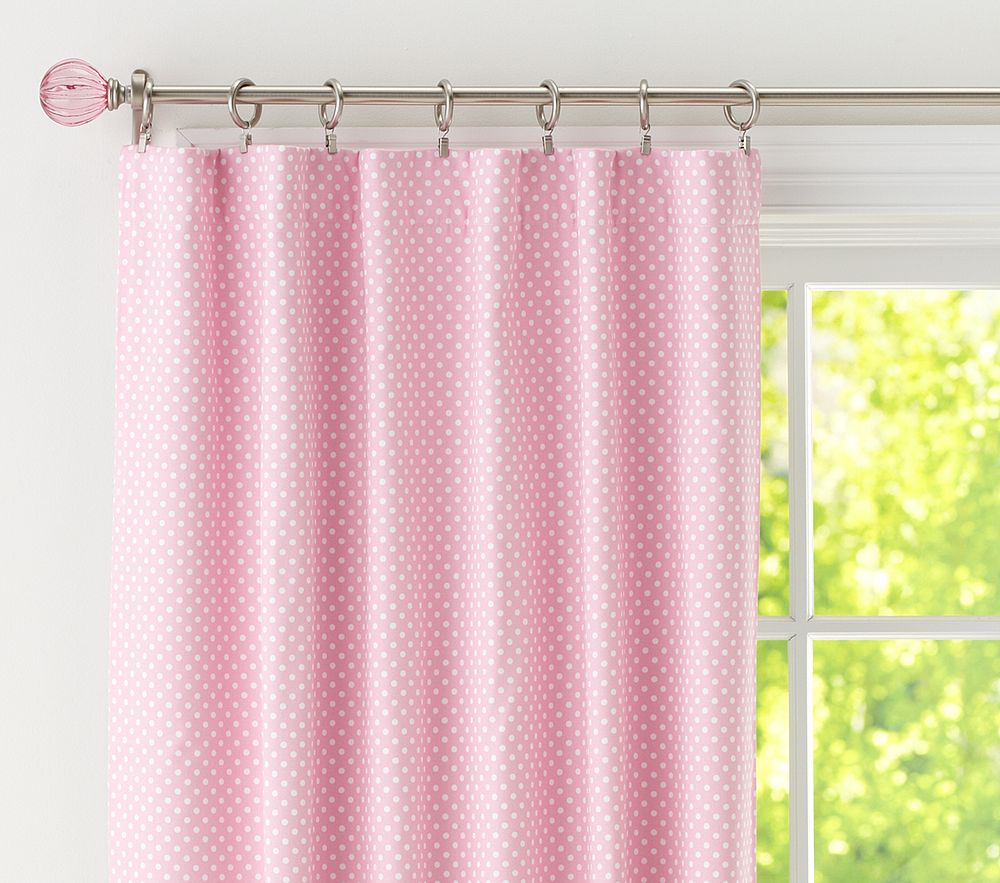
Still wondering if I want to build a padded headboard for her, or scour the second-hand shops for some cheap treasure. Not sure. But definitely wanting these pink curtains from Pottery Barn!

Pottery Barn

Husband didn't like it when I mentioned painting the woodwork white, but come on, just give me this room pleeeeese! I'm going all let's-cut-crown-molding-and-paint-and-build-with-wood-and-stuff on him! I might be scaring him, but a girl can dream, right?

Pottery Barn
What about this bed? There's that beadboard again! And it's on sale for $399!!! Really?!? I don't think so. But it's so pretty. *sigh*

Our daughters are so excited to have their own rooms and leave what they currently have:

Hey! Who did all this?!?
So, if anyone has a link to "how to make a cute girls' padded headboard," send it over! I'm off to tackle that paperwork now. :)

Wednesday, February 16, 2011

A Garage Sale Transformation: The 'Cloche'


Many blogs ago, I jumped on the DIY bandwagon and created a cloche out of a cheese dome and candle stick. Every thrifty crafter/decorator was making these and it was all the rage.


It's still the rage to save money and beautify your home. So here is how I did it:
Putting it together was pretty easy with the help of Gorilla Glue and painters tape. Spray paint made it even easier, I used Rustoleum's Oil Rubbed Bronze or ORB as it's known in the crafting world.

The result was outstanding and the cost was minimal. I liked this one so much, I made another one, this time painting it Heirloom White without a candlestick base.


Thanks to Allison at HOH (who made this first?) and to Sarah at Thrifty Decor Chick who showcased it along with other creative crafters.


Monday, February 14, 2011

This Year's 'Paint Color Of The Year?'

Photo Credit - Benjamin Moore
According to the color designers at Benjamin Moore, the forecast for this year's favorite paint color will be Vintage Wine. This rich shade hints of aubergine, or eggplant and may be the replacement color for the recent gray shades spotted on the web.


As we all know, paint can be the most inexpensive way to change the look and feel of any room.


Two summers ago, Husband and I painted our living room wall a rich brown with gray undertones. We weren't too afraid of how dark it was because it was the longest wall in the room. The result was great, it provided warmth without closing us in. It also became the accent colors for our accessories.


Martha Stewart's "Monk's Cloth"

Surprisingly enough, it also covered some of the imperfections in the drywall. My favorite paint finish is a satin or egg shell finish for interiors.